Zero Spoon Meals for Long Days

You know this scenario:

Your day runs unexpectedly long, your symptoms are flaring and you are wading through the Slog. You’ve long since used every spoon you have and then some. You need food but don’t have the oomph or willpower to prepare anything healthful. What do you do?

Do you follow the path of least resistance and gorge on calorie-dense, nutrition-poor snack foods? Buckle down to force your body past capacity to make that healthful food? Order take-out, even though it’s not really in your budget or helpful for your symptoms?

None of these options deserves moral judgment: in no-win situations, we have no good calls to make. But realistically, all these choices are liable to drive you further into energy debt and keep a vicious cycle going.

Zero spoon days happen. They are less likely to be no-win food days, though, if we face that truth squarely when we do have energy and prepare for them in advance.

Image shows a close-up of white to pale lavender fleabane flowers. Some of them are past the first flush of bloom, and all their petals are curled back tightly. They are still lovely with deeper color and perfect symmetry, rocking their zero-spoon days.

We have created a new category on One Spoon Cooking for zero-spoon options. This first Zero-Spoon post features one of my vanlife favorites. It illustrates the kind of advance thinking and preparation I encourage—not daunting or complicated to prepare, easily adapted, easy to cook in a couple of ways. Alas, I would probably (wrongly!) have sneered at it while in my house, because I would (wrongly!) have associated it with bad backpacking food:

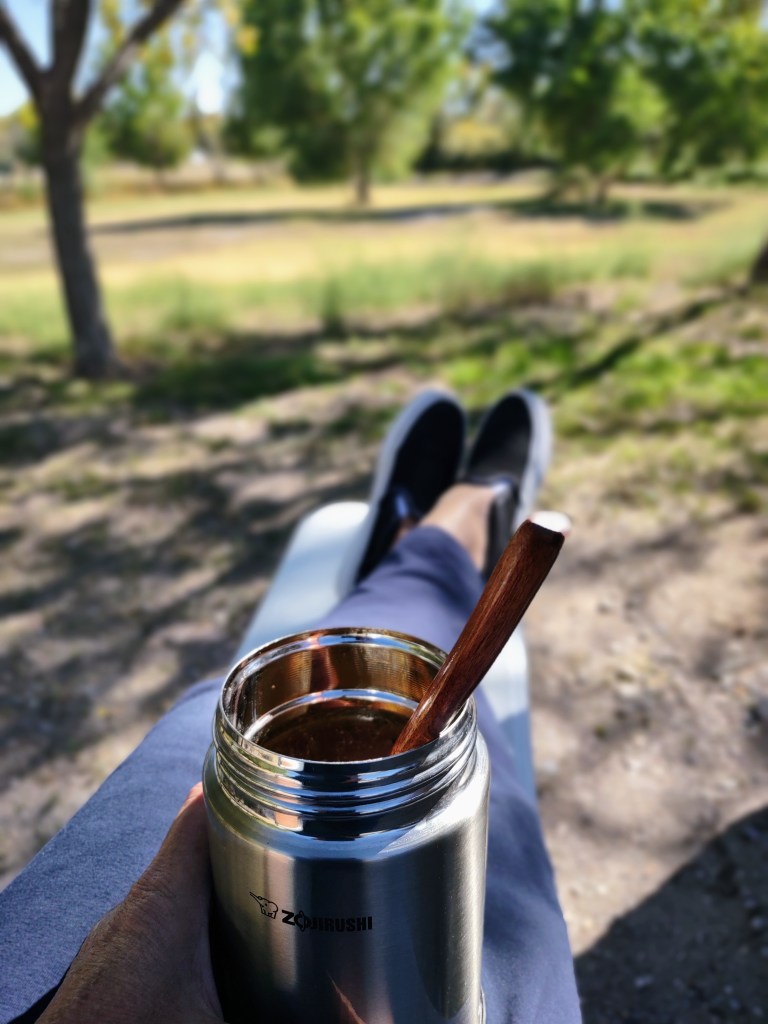
Thermos soup made with boiling water and dehydrated veggies and beans.

Oh, tell me you’re not sneering. Thermoses and dried veggies are great additions to your low-spoon toolkit.

Photo shows a deep-dish blue plate on a matching blue placemat. Artfully arranged on the dish (::cough:)) are soup mix ingredients: navy and green beans, tomato powder, soy curls, and dried herbs and spices. To the side is one smallish wooden spoon, which is all the energy the assembly demands.

Advance planning: On a day when I have about half a spoon of spare energy (5 minutes to gather/put away ingredients, and 5 minutes to mix them), I make 6 servings of dry soup mix, with parboiled, dehydrated navy beans, dehydrated vegetables, and seasonings.

Zero spoon days: On a day I know will be exhausting, like my weekly travel and chore days, I add a serving of soup mix, olive oil, and boiling water to a thermos in the morning (zero spoons). On unexpected no-energy days I do the same at some point when I’m already up and about so I don’t waste energy making a special trip to the kitchen. At dinner time, when I most need some nutritious, hearty, comfort food, I have a delicious meal all ready to go (zero spoons).*

That is six zero-spoon meals, my friends, for half a spoon’s worth of energy in advance. That is a lot of flavor and nutrition bang for the effort buck. 

I wish I had even thought of the humble thermos when I was still working or had my house. Thermoses are portable—I could have eaten a hot (or cold) meal between exhausting errands or doctor’s appointments. They are lightweight—I would not have had to lug the slow-cooker around my kitchen. Their vacuum-sealed, not-quite-boiling, slow-cooking environment concentrates flavors, which means more taste for less effort. My thermos is small enough to open without hurting my hands on higher pain days.

And dehydrated veggies—well. They will get their own post, because they have been game changers for me. But for now, suffice it to say that they have 90% of the nutrition of their fresh counterparts with no chopping. As long as you don’t expect any preserved food to act or taste like fresh (do you expect vodka to taste like a potato??), you can play to their strengths, and zero-spoon soup mixes are one of dehydrated veggies’ very great strengths.

I’ve been told that proper food blogs feature photos of the plated dish, so here ya go: Image shows a hand holding a shiny, silver thermos with a spoon sticking out of it at a jaunty angle. The diner’s feet are elevated on a bench outdoors. (Could she possibly have POTS??) In the sunlit background, cottonwoods along the southern Rio Grande are just barely tinged with autumn gold.

I’ll share the recipe below as an example of proportions. So many of us have food sensitivities or special diets that recipes aren’t always much use among us. If the idea makes sense in your life, though, the recipe is here as a helpful framework for you to build on.

Tl;dr takeaways:

  • Prepare ahead for inevitable zero-spoon days.
  • Thermoses are lightweight, portable ways to cook hot zero-spoon foods.
  • Dehydrated veggies make great zero-spoon soups.

What about you? What is one simple, low-effort thing you can do this week to set yourself up for a nutritional win on your next zero-spoon day? How might you make it a habit?

__________________

*At dinner time I could also just put the soup mix, oil, and water in a pot on the stove for 15 minutes. Physically that would still be zero spoons, but it would cost a mental spoon because I’d have to find the gumption to take action.

Zero Spoon Day Navy Bean Soup

(Note of caution: I never actually measure anything, so these are all estimates. But they’re close enough to give you the idea.)

Per serving:

1/4 C parboiled, dehydrated navy beans

1 T unflavored soy curls/TVP flakes

1 heaping T dehydrated green beans

1 scant T dehydrated spinach

1 heaping tsp. tomato powder

½ tsp. Italian seasoning or to taste

½ tsp. fennel seed

¼ tsp. black pepper

Salt to taste

Put everything together in a zip-lock bag and shake to mix. Sometimes I also add 1 T dry packed, julienne sliced sun-dried tomatoes per serving.

To prepare: Add ingredients to a 16-oz. vacuum-seal food jar with about 1 T olive oil and boiling water to fill the jar. I usually add garlic powder and sometimes chives just prior to serving, as thermos lids absorb garlic and onion odors too, too well. Cost: roughly $2.50-3.00 per serving.

Rolling Food Prep Part 4

Pros and Cons of Other Strategies

In this series, I’ve explored “rolling food prep” as a strategy for pacing: preparing extras of one or two ingredients each time you cook, so that you prepare about half of each meal fresh and assemble the rest from previously prepared ingredients. Part 1 introduced the basic concept. Part 2 showed my typical weekly template for meal planning. Part 3 looked at how that template turned into a week’s menus.

In this final post we’ll consider some other strategies—ones that have real strengths but that did not work for me. Of course, they do work well for many—we all have different abilities, resources of time and money, and interest in food and cooking. I’m certainly not preaching against these strategies! But if you’re new to life with an energy-limiting condition, this post may save you some trial and error.

The Strategies

Batch cooking—making one huge meal on Saturdays, say, and eating the leftovers for the rest of the week. Batch cooking does make most of the week easy, but cooking day can be intense. If you have limited or highly variable energy, this may not work for you. On the other hand, if you are working, batch cooking can guarantee you a healthy meal even when you come home from work exhausted.

For me, cooking day was overwhelming, and by the fourth day of leftovers, I dreaded the food. If I didn’t have the energy to cook on the designated day, then I didn’t have meals prepared for the whole week—especially a problem if I had several low-energy days in a row. Lots of ingredients spoiled when I couldn’t get to them on time.

Once-a-week food prep—pre-chopping or cooking lots of foods to combine throughout the week. This method has many of the strengths of batch cooking while making it easier to vary your meals. Still, I ran into the same problems: food-prep day was often intense enough to provoke crashes; if I couldn’t prep I had nothing to eat; and I wasted food.

30-minute meals from cookbooks. Most of the brain-work, from making the grocery list to integrating the steps for multiple dishes, is done. The ingredients are usually few and flavor-packed. The meals are likely to be tasty and (reasonably) nutritionally balanced.

I enjoyed this option most—even more than rolling food prep, just because the recipes were reliably good. Since I’m cooking for one, I could cook 3-4 times a week and have leftovers to freeze or mix around for variety or to keep in reserve for no-energy days.

30-minute meals, though, use time efficiently—not energy. Every one of those 30 minutes is jam-packed with activity, and that doesn’t include the time to get ingredients out, wash produce, and put things away. Factoring in my slow-moving mind and body, I needed at least 60 minutes to cook a 30-minute meal. It was exhausting, exacerbated my POTS, and pushed me out of my “energy envelope.”

Convenience foods like take-out, frozen pizza, or TV dinners, supplemented with salads or quickly prepared veggies. For zero-spoon days, this is certainly the easiest option—and far better than going without food! Even the healthiest convenience foods, though, are not nutritionally balanced. They often contain ingredients that don’t work with special diets, and they are expensive. I was priced out of this option. I do turn to these foods in a pinch, but not as a standard part of my diet.

5-ingredient “meals.” Simplicity is the best feature of these meals. They often rely on store-bought sauces or mixes for flavor, though, which pose the same problems as convenience foods. And no matter what they call themselves, they aren’t usually full meals, complete with protein, carbs, and three vegetables—when I tried them, I usually found myself preparing other dishes to round things out, which defeated the purpose.

Small-batch cooking—only chopping enough vegetables, etc., for one serving at a time. This lets a solo cook do smaller amounts of work per day, which can help with pacing. It can be a relief only to chop one carrot, or half an onion—I liked that, when cooking my vegetable-heavy meals. The inefficiency of getting out the same bag of carrots EVERY DAY to prepare one carrot, though, drove me up the wall and cost me more energy overall. This method also creates no leftovers to have on hand for no-energy days.

Meal Kit Services. These services deliver all the pre-chopped and measured ingredients for several meals to your door. All you have to do is open the packaging and follow the cooking directions. Nutritious, “foodie-friendly” options are available for many special diets.

I have not tried these kits, but friends have found that just opening the packaging (and then recycling it when done) challenged their energy; the meals also still took them at least 30 minutes of active time. In addition, these services are not budget friendly for those with limited means.

Rolling Food Prep to the Rescue

Rolling food prep keeps many of the strengths of the above methods and solves many of the problems:

  • You can stay within your energy envelope, doing small amounts of work often rather than huge amounts at once.
  • You always have a range of prepared ingredients on hand, even on no-energy days.
  • You get plenty of variety.
  • Frequent food prep minimizes waste.
  • All ingredients are known to you and can be safe for your diet.
  • Meals are budget-friendly.

This has been the most sustainable method I have found so far—the best combination of gentle on the body, affordable, and satisfying to eat, while still making provision for no-energy days.

Resources

For more ideas, see:

  • Naturally Ella on component cooking
  • Pam Anderson, How to Cook Without a Book, especially the chapter called “A Little Mise”
  • Ronna Welsh, The Nimble Cook, especially the introduction

Rolling Food Prep Part 3

Case Study: A Week’s Menus

In this 4-part series, I’m exploring “rolling food prep” as a strategy for pacing: preparing extras of one or two ingredients each time you cook for use in future meals, so that you prepare about half of each meal fresh and assemble the rest from previously prepared ingredients. Part 1 introduces the basic concept. Part 2 shows my typical weekly template for meal planning, which focuses on one type of food a day: beans, perishable produce, meat, “sturdy” produce, grains, and condiments.

In this post we’ll look at how this routine played out in last week’s actual menus in my one-spoon kitchen. Even if the foods aren’t suitable for your diet (or tastes), I hope this “real-world” example is helpful in showing the general balance of fresh effort to re-assembly, and how that balance can help you create tasty, nutritious meals with real variety.

I’ve underlined ingredients that I prepared extras of that day, and italicized the foods I had already made (sometimes weeks before). I’ve also noted how much active time each meal took—not the start-to-finish time, but the time I was actually on my feet doing something—and estimated the time needed if everything were prepared from scratch instead.

Thursday
* Cannellini beans with kalamata olives, sundried tomatoes, and lots of finely chopped fresh parsley; tossed with oil and red wine vinegar
* Roasted, chopped cauliflower and carrots with balsamic reduction sauce
* Pita toasts with basil oil
Active time: 15 minutes (35-40 if all ingredients are prepared fresh)

Friday
* Baked sweet potatoes topped with slow-cooked jammy onions, red peppers, and cherry tomatoes and shredded smoked mozzarella
* Sautéed baby spinach with crumbled bacon
Active time: 15-20 minutes (25-30 if everything is prepared fresh)

Saturday
*Cannellini and summer squash soup (cooked in bean broth)
* Arugula salad with sliced pear, toasted pecans, and lemon-orange dressing
* Pita toasts with basil oil
Active time: 25 minutes (30 if everything prepared fresh)

Sunday
Leftovers

Monday
* Whole-wheat pasta tossed with arugula-poblano pesto and feta cheese
* Tomato-onion soup
(Since I had the food processor out for the pesto, I also shredded carrots for Tuesday)
Active time: 20 minutes (40 if everything prepared fresh)

Tuesday
*Shredded carrot salad with lemon-orange dressing and fennel seed
*Poached chicken breast and rice with sautéed onion and New Mexico red chile sauce
Active time: 15 minutes (45+ if everything prepared fresh)

Wednesday
* Sautéed red cabbage, onion, and apple, with cider vinegar and caraway
* Cannellini beans with sage oil
* Baked sweet potato
Active time: 20 minutes (25-30 if everything prepared fresh)

These were not complex meals (if by some chance they sound impressive, then trust me, they weren’t), but they each had a protein, starch, and three vegetables,* beautiful colors, balanced flavors, and varied textures. If I had tried to prepare every ingredient from scratch each day, I would have had to settle for much less.

Rolling food prep can save anywhere from 5 to 30 minutes of active effort each day, usually averaging half the time it would take to prepare the same meal fresh. It also puts a lot of ready-to-go components at your disposal for no-energy days.

There are alternative strategies for low-energy cooking, of course, from batch cooking to meal services to once-a-week prepping. In the last post of this series I’ll talk about some of them and why rolling food prep has worked best for me.

_______________________
* Note: Red chile is a vegetable here in New Mexico rather than a condiment. It is the food of the gods, and we eat generous portions!